- EKS, Docker, ECR, Nginx, Tomcat, MySQL를 이용하여 진행하였습니다.
- OS는 Amazon Linux 2023으로 진행하였습니다.
AWS Configure 적용
- IAM을 통해 생성한 Access Key 등록
aws configure
AWS Access Key ID [None]:
AWS Secret Access Key [None]:
Default region name [None]:
Default output format [None]:
Dockerfile 생성
sudo yum install -y docker
sudo systemctl start docker
sudo systemctl enable docker
sudo systemctl status docker
docker 작업용 폴더 생성
mkdir docker
cd docker
웹 페이지를 위한 몇몇개의 파일 생성
vi context.xml (Tomcat와 DB연동)
<?xml version="1.0" encoding="UTF-8"?>
<!--
Licensed to the Apache Software Foundation (ASF) under one or more
contributor license agreements. See the NOTICE file distributed with
this work for additional information regarding copyright ownership.
The ASF licenses this file to You under the Apache License, Version 2.0
(the "License"); you may not use this file except in compliance with
the License. You may obtain a copy of the License at
http://www.apache.org/licenses/LICENSE-2.0
Unless required by applicable law or agreed to in writing, software
distributed under the License is distributed on an "AS IS" BASIS,
WITHOUT WARRANTIES OR CONDITIONS OF ANY KIND, either express or implied.
See the License for the specific language governing permissions and
limitations under the License.
-->
<!-- The contents of this file will be loaded for each web application -->
<Context>
<Resource name="jdbc/MyDB"
auth="Container"
type="javax.sql.DataSource"
maxTotal="100"
maxIdle="30"
maxWaitMillis="10000"
username="admin"
password="your_password"
driverClassName="com.mysql.cj.jdbc.Driver"
url="jdbc:mysql://dyyeom-test-db.csuhqyt3lq7d.ap-northeast-2.rds.amazonaws.com/dyyeom"/>
<!-- Default set of monitored resources. If one of these changes, the -->
<!-- web application will be reloaded. -->
<WatchedResource>WEB-INF/web.xml</WatchedResource>
<WatchedResource>WEB-INF/tomcat-web.xml</WatchedResource>
<WatchedResource>${catalina.base}/conf/web.xml</WatchedResource>
<!-- Uncomment this to enable session persistence across Tomcat restarts -->
<!--
<Manager pathname="SESSIONS.ser" />
-->
</Context>
sudo vi default.conf (Nginx와 Tomcat 연동)
server {
listen 80;
server_name 13.125.175.72;
location / {
proxy_pass http://13.125.175.72:8080;
proxy_set_header Host $host;
proxy_set_header X-Real-IP $remote_addr;
proxy_set_header X-Forwarded-For $proxy_add_x_forwarded_for;
proxy_set_header X-Forwarded-Proto $scheme;
}
}
Tomcat을 설치하면 /opt/tomcat/webapps 경로의 webapps 폴더를 docker 폴더로 복사
sudo cp /opt/tomcat/webapps /home/ec2-user/docker
cd /home/ec2-user/docker/webapps/ROOT
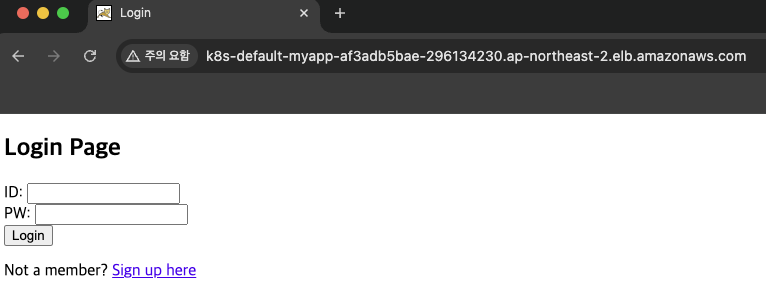
sudo vi index.jsp (Tomcat의 메인 페이지)
<!DOCTYPE html>
<html>
<head>
<title>Login</title>
</head>
<body>
<h2>Login Page</h2>
<form action="login-process.jsp" method="POST">
ID: <input type="text" name="id" required><br>
PW: <input type="password" name="pw" required><br>
<input type="submit" value="Login">
</form>
<p>Not a member? <a href="signup.jsp">Sign up here</a></p>
</body>
</html>
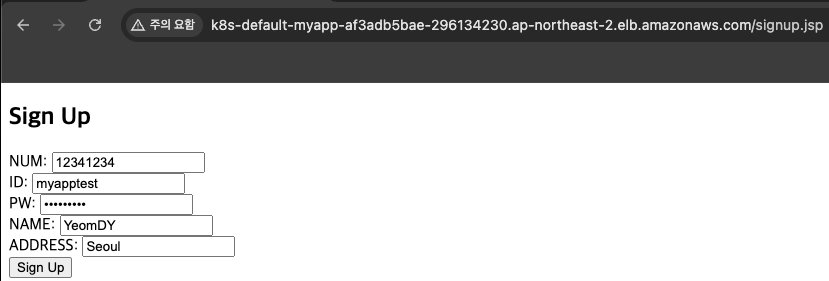
sudo vi signup.jsp
<!DOCTYPE html>
<html>
<head>
<title>Sign Up</title>
</head>
<body>
<h2>Sign Up</h2>
<form action="signup-process.jsp" method="POST">
NUM: <input type="text" name="num" required><br>
ID: <input type="text" name="id" required><br>
PW: <input type="password" name="pw" required><br>
NAME: <input type="text" name="name" required><br>
ADDRESS: <input type="text" name="address" required><br>
<input type="submit" value="Sign Up">
</form>
</body>
</html>
sudo vi signup-process.jsp
<%@ page import="java.sql.*, javax.naming.*, javax.sql.DataSource, java.io.*" %>
<%
request.setCharacterEncoding("UTF-8");
String num = request.getParameter("num");
String id = request.getParameter("id");
String pw = request.getParameter("pw");
String name = request.getParameter("name");
String address = request.getParameter("address");
Connection conn = null;
PreparedStatement pstmt = null;
try {
// JNDI를 통해 데이터소스 가져오기
Context initContext = new InitialContext();
Context envContext = (Context) initContext.lookup("java:/comp/env");
DataSource ds = (DataSource) envContext.lookup("jdbc/MyDB");
// 데이터베이스 연결
conn = ds.getConnection();
// SQL 쿼리 작성
String sql = "INSERT INTO user (NUM, ID, PW, NAME, ADDRESS) VALUES (?, ?, ?, ?, ?)";
// PreparedStatement를 사용하여 데이터베이스에 값 삽입
pstmt = conn.prepareStatement(sql);
pstmt.setString(1, num);
pstmt.setString(2, id);
pstmt.setString(3, pw);
pstmt.setString(4, name);
pstmt.setString(5, address);
// 쿼리 실행
int result = pstmt.executeUpdate();
// 회원가입 성공 시 로그인 페이지로 리다이렉트
if (result > 0) {
response.sendRedirect("index.jsp"); // 회원가입 성공 후 login.jsp로 리다이렉트
} else {
out.println("회원가입 실패.");
}
} catch (Exception e) {
StringWriter sw = new StringWriter();
PrintWriter pwPrint = new PrintWriter(sw);
e.printStackTrace(pwPrint);
out.println("<pre>" + sw.toString() + "</pre>");
} finally {
// 리소스 해제
if (pstmt != null) try { pstmt.close(); } catch (SQLException e) { out.println("Error closing pstmt"); }
if (conn != null) try { conn.close(); } catch (SQLException e) { out.println("Error closing conn"); }
}
%>
sudo vi login-process.jsp
<%@ page import="java.sql.*, javax.naming.*, javax.sql.DataSource, java.io.*" %>
<%
String id = request.getParameter("id");
String pw = request.getParameter("pw");
Connection conn = null;
PreparedStatement pstmt = null;
PreparedStatement insertPstmt = null;
ResultSet rs = null;
try {
// 데이터베이스 연결
Context initContext = new InitialContext();
Context envContext = (Context) initContext.lookup("java:/comp/env");
DataSource ds = (DataSource) envContext.lookup("jdbc/MyDB");
conn = ds.getConnection();
// ID와 PW가 일치하는지 확인
String sql = "SELECT * FROM user WHERE ID = ? AND PW = ?";
pstmt = conn.prepareStatement(sql);
pstmt.setString(1, id);
pstmt.setString(2, pw);
rs = pstmt.executeQuery();
if (rs.next()) {
// 로그인 성공 시, login 테이블에 기록
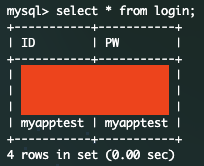
String insertSql = "INSERT INTO login (ID, PW) VALUES (?, ?)";
insertPstmt = conn.prepareStatement(insertSql);
insertPstmt.setString(1, id);
insertPstmt.setString(2, pw);
insertPstmt.executeUpdate();
// 로그인 성공 후 home.jsp로 리다이렉트
response.sendRedirect("home.jsp");
} else {
out.println("Login failed. Please try again.");
}
} catch (Exception e) {
StringWriter sw = new StringWriter();
PrintWriter pwPrint = new PrintWriter(sw);
e.printStackTrace(pwPrint);
out.println("<pre>" + sw.toString() + "</pre>");
} finally {
// 리소스 해제
if (rs != null) try { rs.close(); } catch (SQLException e) { e.printStackTrace(new PrintWriter(out)); }
if (pstmt != null) try { pstmt.close(); } catch (SQLException e) { e.printStackTrace(new PrintWriter(out)); }
if (insertPstmt != null) try { insertPstmt.close(); } catch (SQLException e) { e.printStackTrace(new PrintWriter(out)); }
if (conn != null) try { conn.close(); } catch (SQLException e) { e.printStackTrace(new PrintWriter(out)); }
}
%>
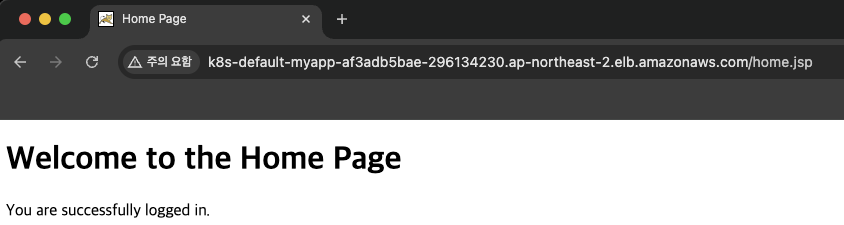
sudo vi home.jsp
<!DOCTYPE html>
<html>
<head>
<title>Home Page</title>
</head>
<body>
<h1>Welcome to the Home Page</h1>
<p>You are successfully logged in.</p>
</body>
</html>
cd /home/ec2-user/docker
sudo vi entrypoint.sh
nginx
echo "Starting Tomcat..."
/opt/tomcat/bin/catalina.sh run
echo "Tomcat started successfully."
cd /home/ec2-user/docker
sudo vi Dockerfile
FROM amazonlinux:2023
RUN yum install -y nginx
COPY default.conf /etc/nginx/conf.d/
RUN yum update -y && \
yum install -y java-11-amazon-corretto
RUN yum install -y wget
RUN yum install -y unzip
RUN yum install -y tar
RUN wget https://downloads.apache.org/tomcat/tomcat-10/v10.1.31/bin/apache-tomcat-10.1.31.tar.gz && \
tar -xvzf apache-tomcat-10.1.31.tar.gz -C /opt/ && \
mv /opt/apache-tomcat-10.1.31 /opt/tomcat && \
chmod +x /opt/tomcat/bin/*.sh
COPY webapps/ROOT/ /opt/tomcat/webapps/ROOT/
COPY context.xml /opt/tomcat/conf/
COPY index.jsp /opt/tomcat/webapps/ROOT/
RUN wget https://dev.mysql.com/get/Downloads/Connector-J/mysql-connector-java-8.0.22.zip && \
unzip mysql-connector-java-8.0.22 && \
cp mysql-connector-java-8.0.22/mysql-connector-java-8.0.22.jar /opt/tomcat/lib/
EXPOSE 80 8080
COPY entrypoint.sh /usr/local/bin/
RUN chmod +x /usr/local/bin/entrypoint.sh
CMD ["/usr/local/bin/entrypoint.sh","run"]
- docker 권한 주기
- docker build
sudo usermod -aG docker $USER
sudo reboot
docker build --no-cache -t my-nginx-tomcat .

--no-cache는 포함시키지 않아도 됩니다. (기존에 빌드한 이력이 있어 혹시 몰라 붙였습니다)
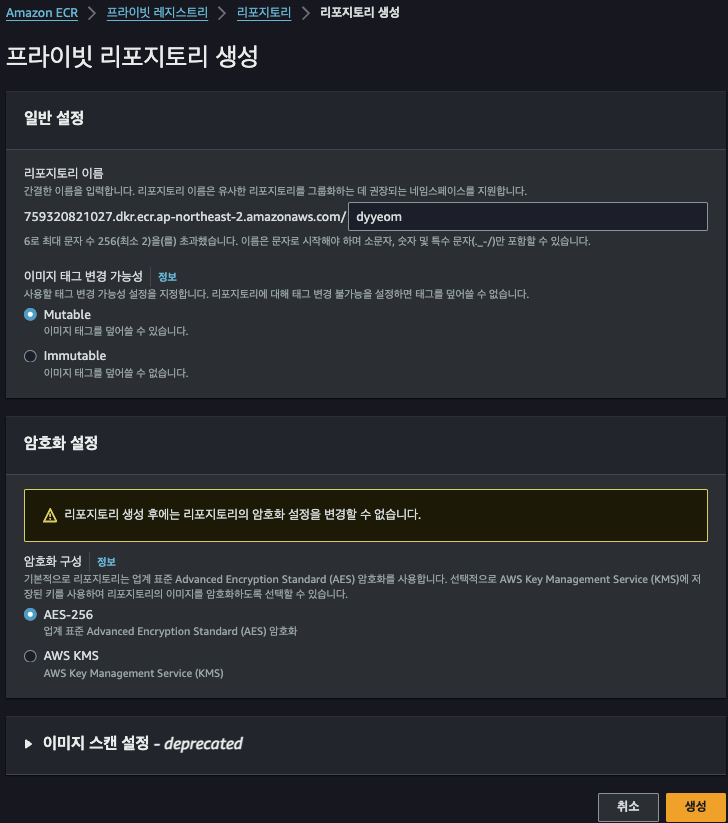
ECR 생성
- Amazon Elastic Container Registry 서비스 들어간 후 리포지토리 생성 클릭

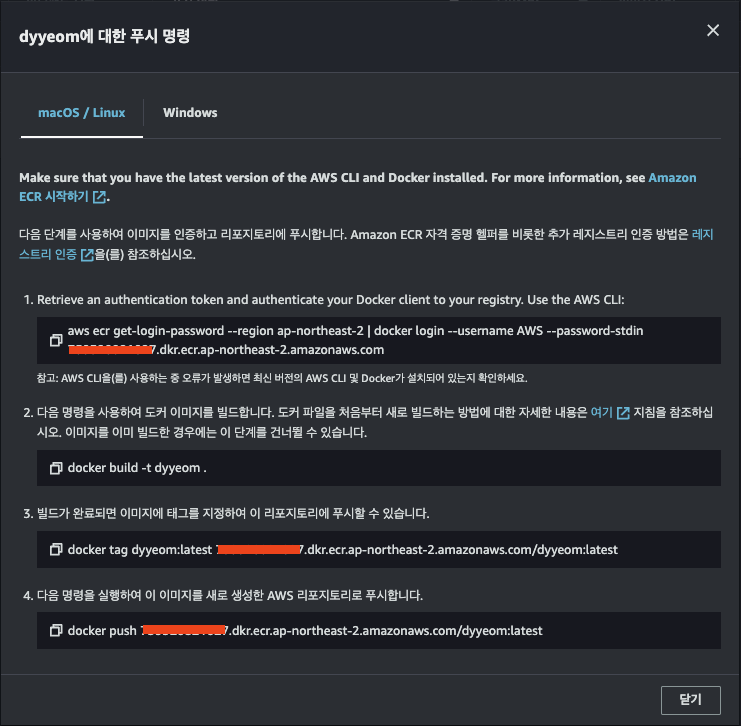
- 다시 Docker build 했던 곳으로 돌아간 후 ecr 로그인
aws ecr get-login-password --region ap-northeast-2 | docker login --username AWS --password-stdin your-account-id.dkr.ecr.ap-northeast-2.amazonaws.com
docker tag my-nginx-tomcat:latest your-account-id.dkr.ecr.ap-northeast-2.amazonaws.com/dyyeom:v4
docker push your-account-id.dkr.ecr.ap-northeast-2.amazonaws.com/dyyeom:v4

EKS Cluster 생성
EKS Load Balance Controller 생성
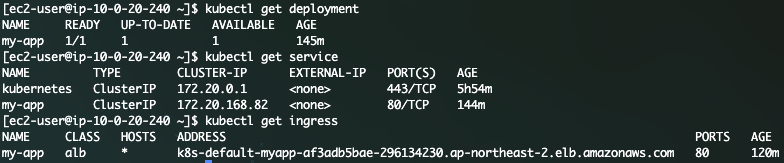
deployment, service, ingress 배포하기
vi deployment

apiVersion: apps/v1
kind: Deployment
metadata:
  name: my-app
  namespace: default
spec:
  replicas: 1
  selector:
    matchLabels:
      app: my-app
  template:
    metadata:
      labels:
        app: my-app
    spec:
      containers:
      - name: tomcat-test
        image: your-account-id.dkr.ecr.ap-northeast-2.amazonaws.com/dyyeom:v4
        ports:
        - containerPort: 8080

vi service.yaml

apiVersion: v1
kind: Service
metadata:
  name: my-app
  namespace: default
  annotations:
    alb.ingress.kubernetes.io/healthcheck-path: "/"
spec:
  selector:
     app: my-app
  type: ClusterIP
  ports:
  - port: 80
    protocol: TCP
    targetPort: 8080

vi ingress.yaml

apiVersion: networking.k8s.io/v1
kind: Ingress
metadata:
  name: my-app
  namespace: default
  annotations:
    alb.ingress.kubernetes.io/scheme: internet-facing
    alb.ingress.kubernetes.io/target-type: ip
    alb.ingress.kubernetes.io/subnets: your-public-subent-a, your-public-subent-c
spec:
  ingressClassName: alb
  rules:
  - http:
      paths:
      - path: /
        pathType: Prefix
        backend:
          service:
            name: my-app
            port:
              number: 80
kubectl apply -f deployment.yaml
kubectl apply -f service.yaml
kubectl apply -f ingress.yaml
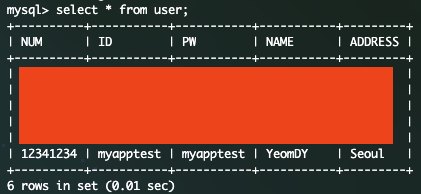
- 페이지 접속 후 DB에 데이터 쌓이는 지 확인